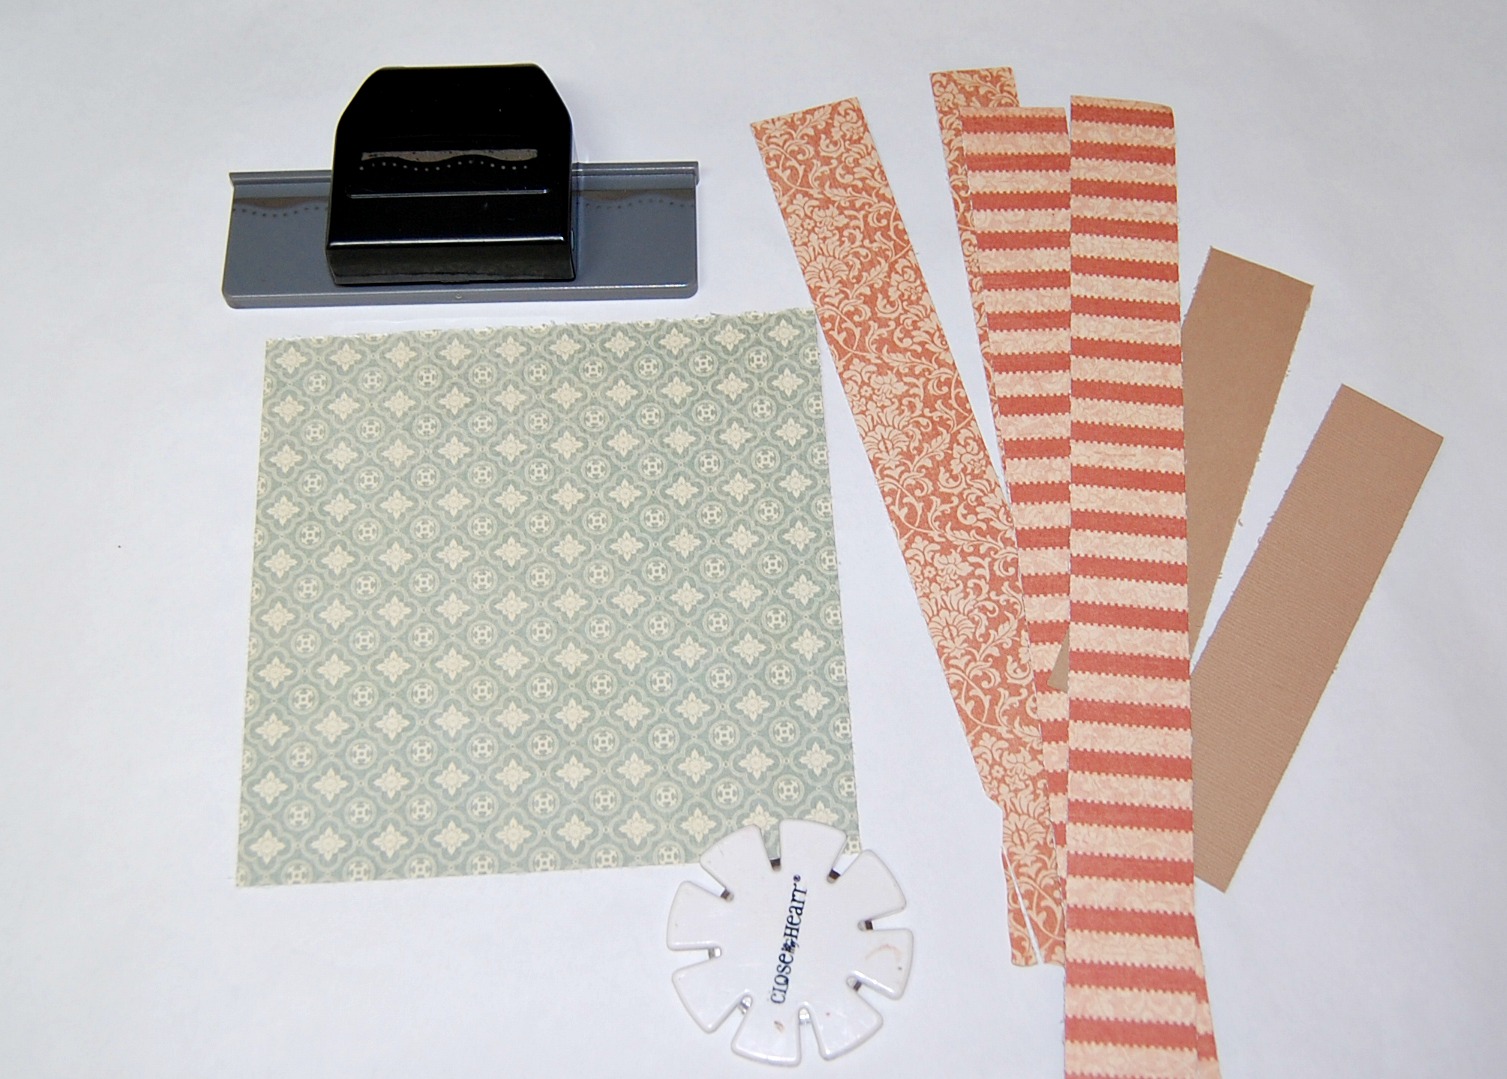
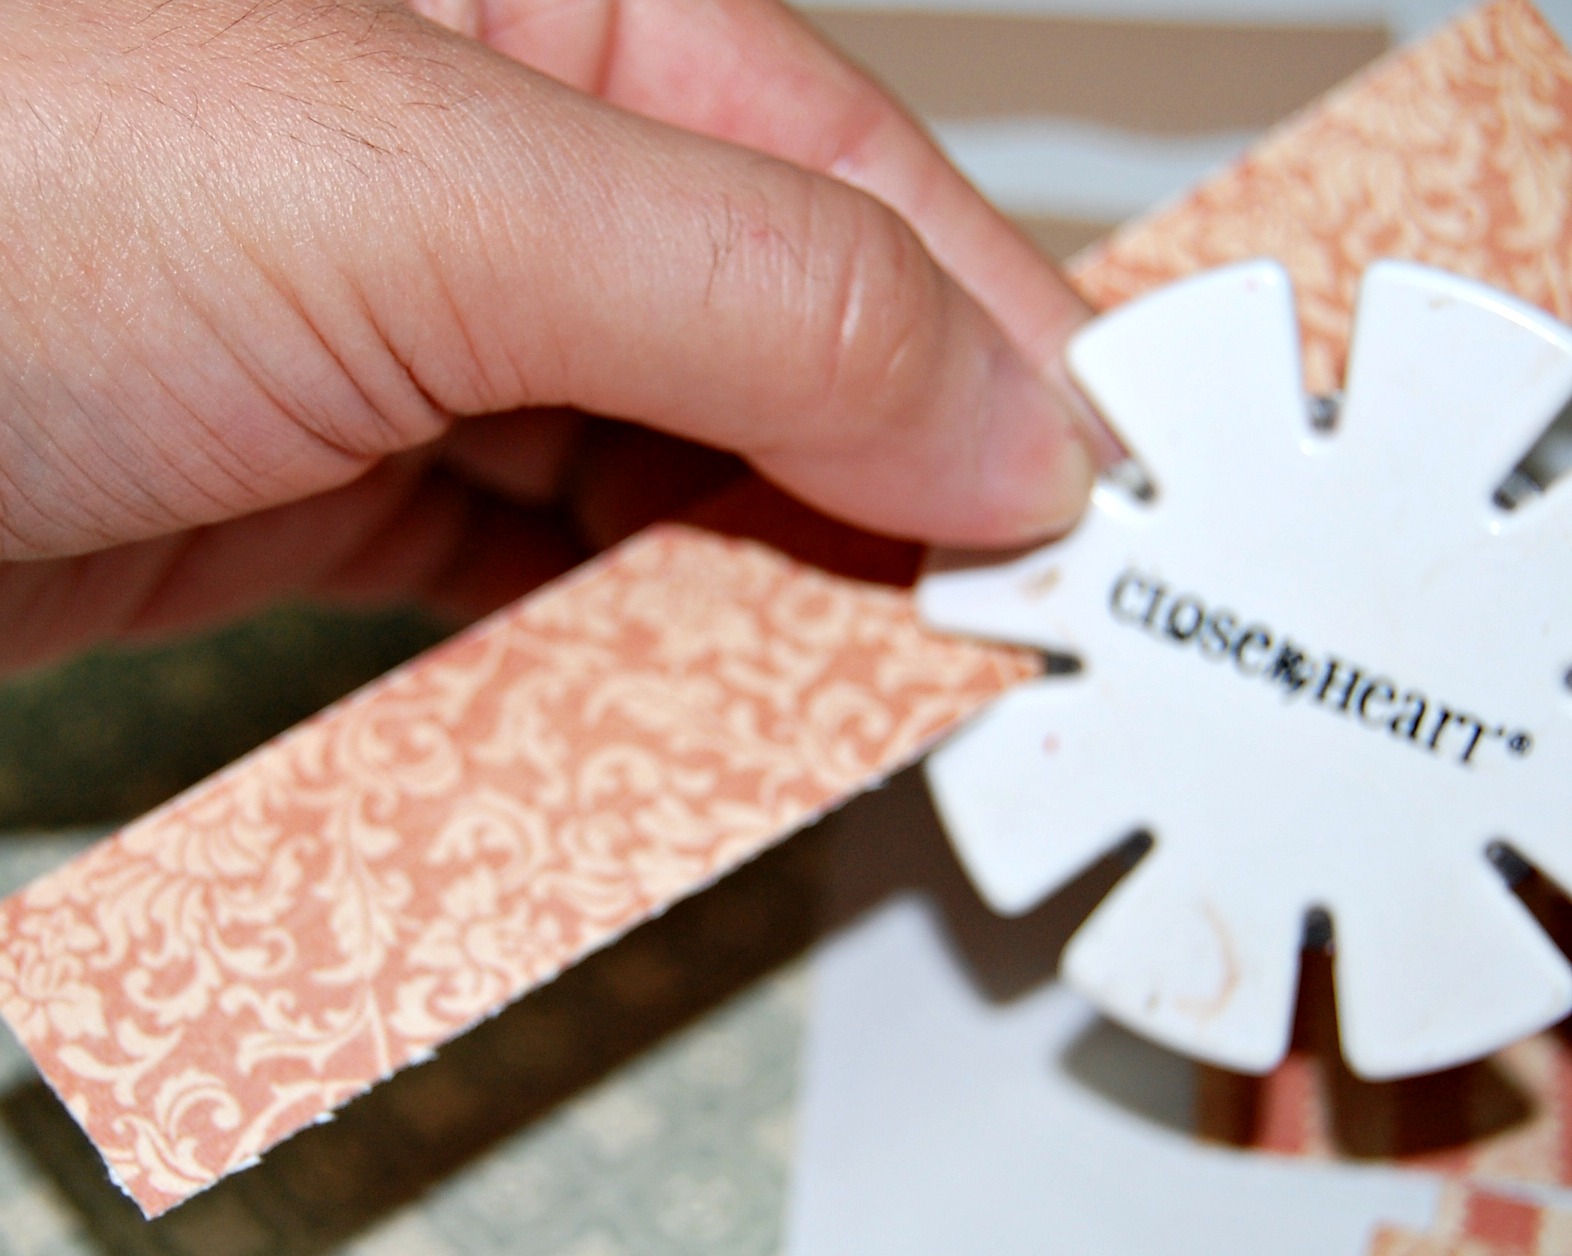
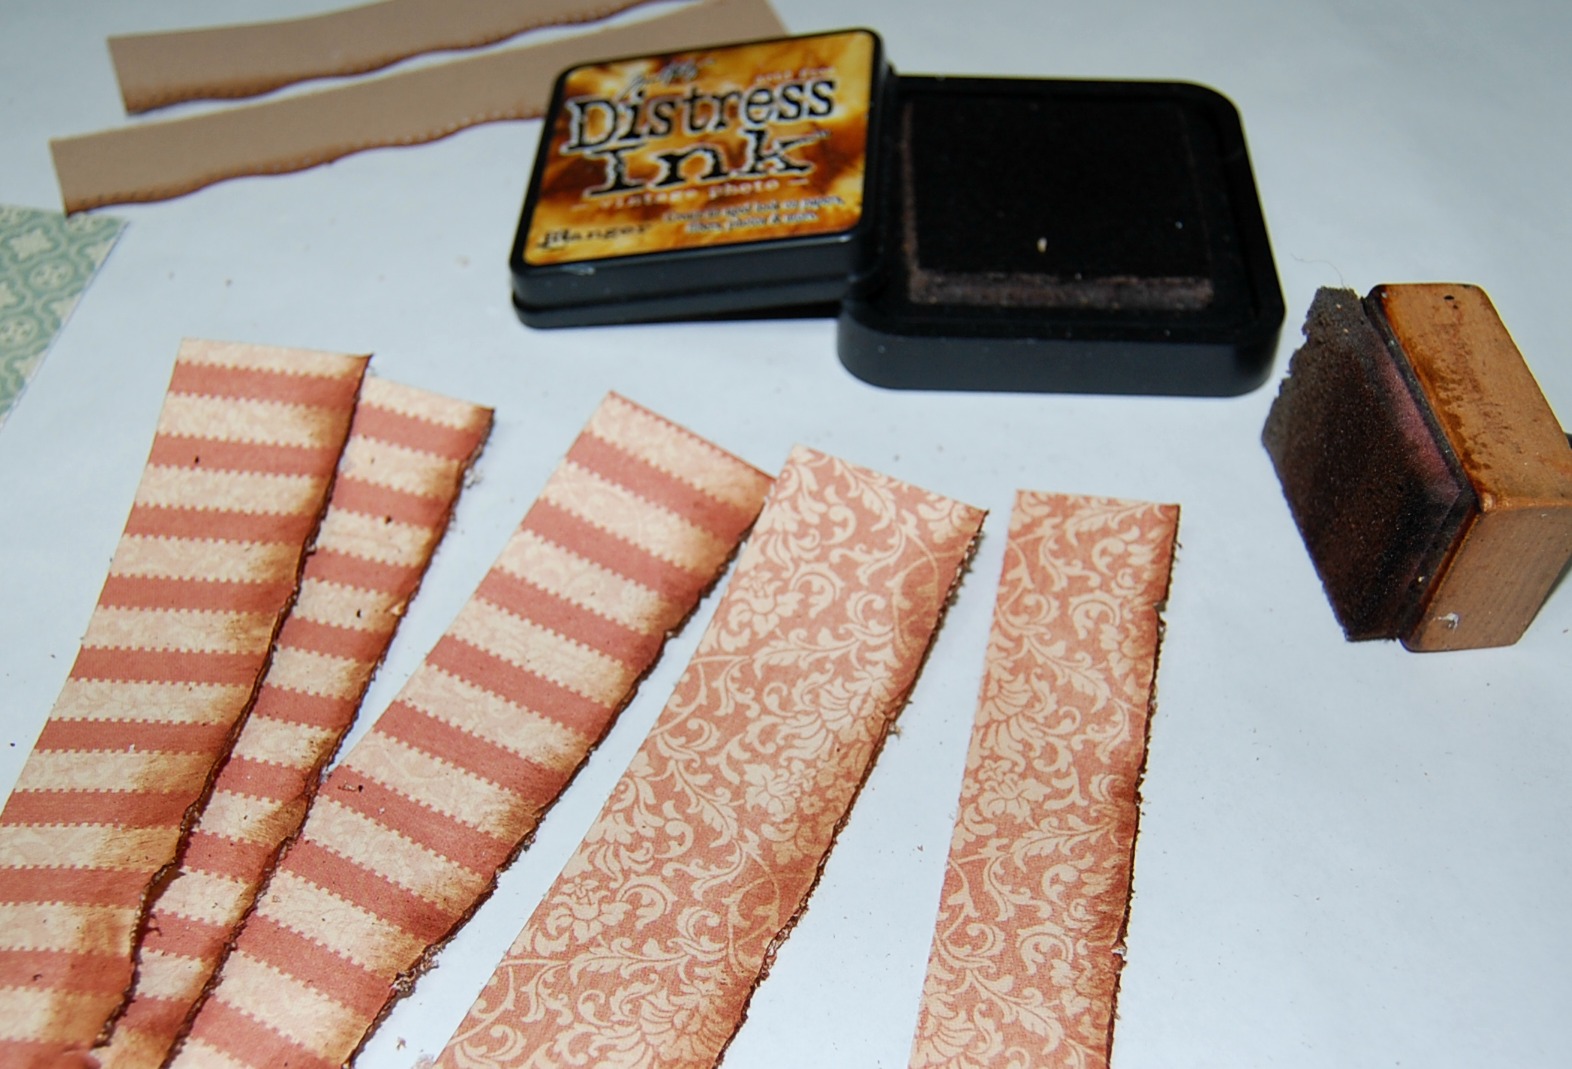
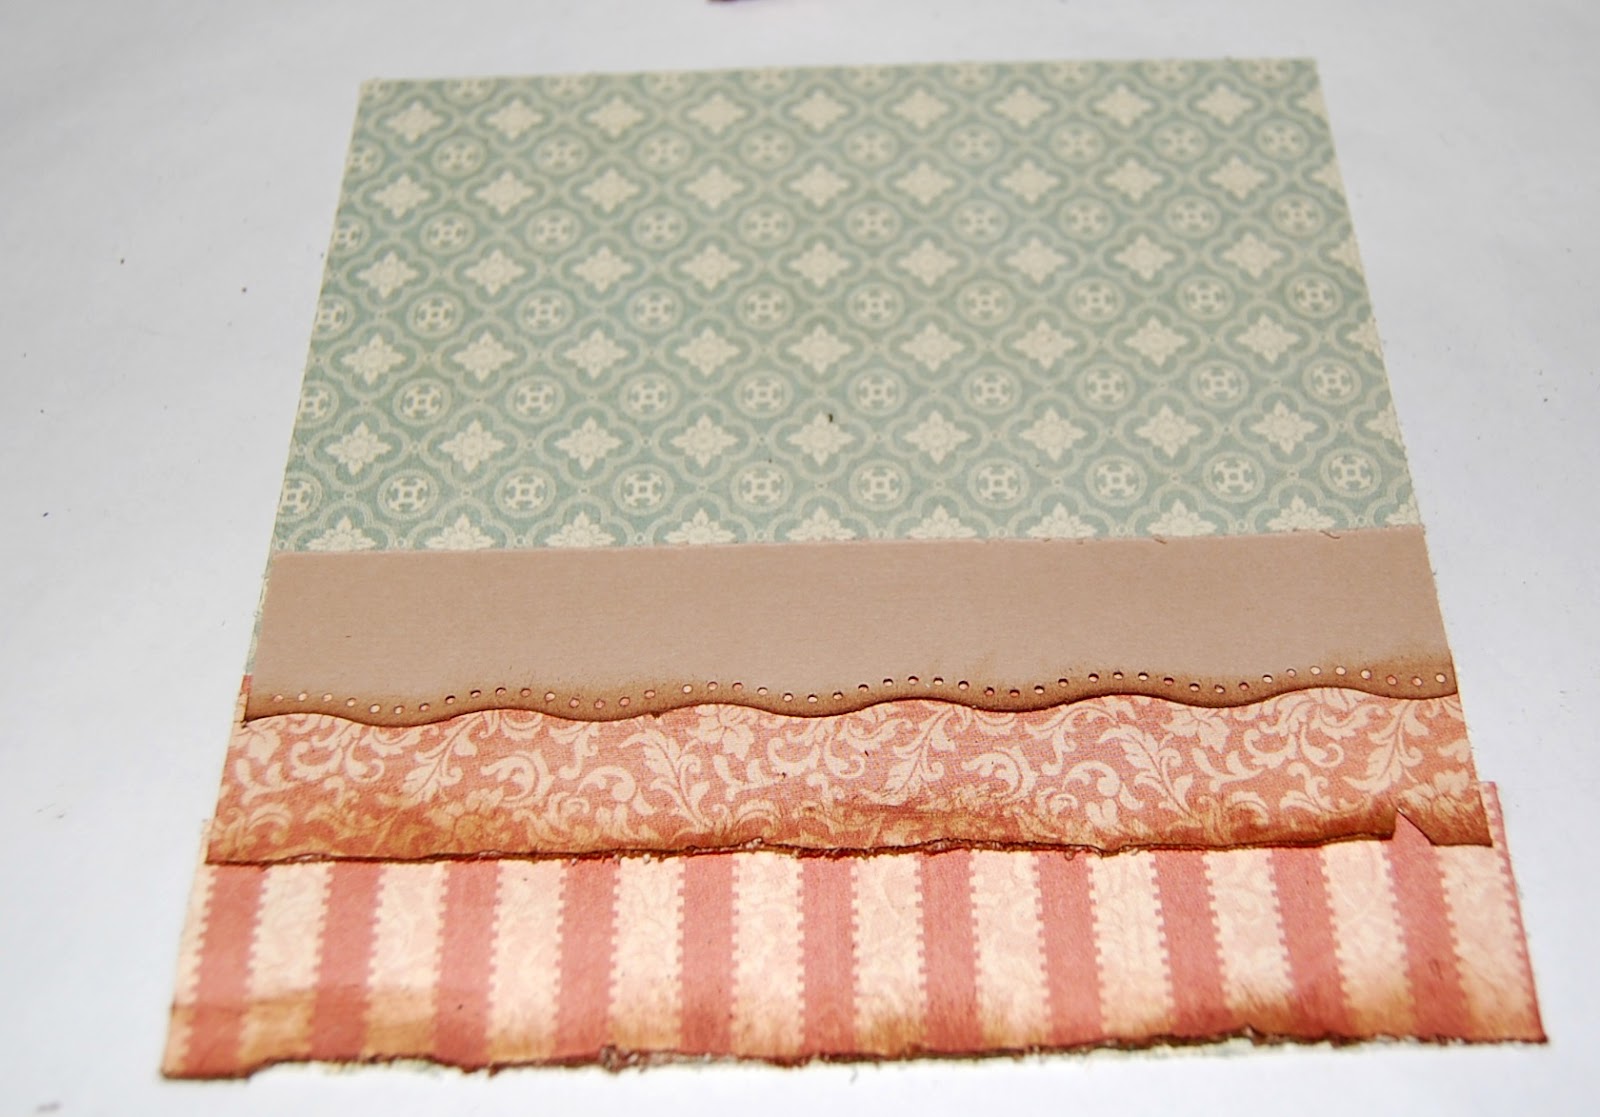
A Beach Day page and Layered background tutorial


Hello there!! Today I'm going to show you with more details one of my pages  'A Beach Day '  with the ScrapThat! September kit-Victorian Dream and I will show you a tutorial about how I made the layered background of my page.  I worked with the Graphic 45-Ladies Diary collection that comes in the September kit , it's a Gorgeous kit, I love it!!! You can find this kit...HERE
I don't go to the beach much because I can't take sunbath is bad for my health condition and the temperature is very hot here but I found this photo in my memory box, it isn't the best pic, the sun was in front of us and we can barely open our eyes but is a lovely memory for me, we had a great day.

More details...

Zva and Prima flowers (Flower add-on)

Prima- Crystals (Embellishment add-on)


Layered Background Tutorial...

Materials...
1-Your background paper
2-Some strips 1 1/2" inches by 12"inches in different papers pattern
3-Distressing Tool
4-A Border puncher

Punch some strips in carstock.

Distress all the strips for one side
It should look like this...

Now distressing ink in each strips...

Now go and start gluing the strips from bottom to top...

It should look like this...

Once you have glued all the strips then cut the excess of paper in both sides of the page.  I added some 3-d dots to create dimension.

And this is the result...you can add corrugated or a zipper between the strips to add more texture.
Thanks for stopping by and for your lovely comments that always made me smile :)!!!
Take care!!

With Love,
Marilyn


Comments

  1. Hi Marilyn

    Amei a página... as cores são lindas. Adorei o background em camadas!

    Xo

    ReplyDelete
  2. Obrigada pelo tutorial!! Vou aproveitar em um layout para mim!! Muito obrigada mesmo!!! Ficou perfeita sua página! Parabéns!!

    ReplyDelete
  3. Great tutorial! I can't wait to try it out.

    ReplyDelete
  4. Beautiful layout, Marilyn~ Such beautiful colors...love your tutorial too!

    ReplyDelete
  5. This is absolutely beautiful, Marilyn...love the colours & your stunning clusters!
    Fantastic tutorial too...I must give this a try some time! :)

    ReplyDelete
  6. Sigue dando tutorial a ver si logro alguna pagina tan hermosas como las tuyas... me encantó
    Julia♥

    ReplyDelete
  7. Wow wow wow wowwwwwwwwwwwwwwwww!! This is STUNNING!!! I loveeeeeeee all the strips, the zipper and loveeeeeeeeeee those shells!!! So BEAUTIFUL!!!!!

    ReplyDelete
  8. such a beautiful page , love the layers so effective, have a great weekend :)

    ReplyDelete
  9. Gracias por mostrarnos uno de tus secretos. Hermosa página con hermosos detalles como siempre.

    ReplyDelete
  10. My dear cousin as always you did an amazing creations... Thanks for always share fantastic ideas.
    Hugs, Sony
    sonia-studio60.blogspot.com

    ReplyDelete
  11. Awesome tutorial and a beautiful page Marilyn!!

    ReplyDelete
  12. Wow! Love this! The layers and distressing looks fabulous! Great pic too...just look at you...so pretty!

    ReplyDelete
  13. Super tutorial!! Me encanto! Gracias por compartir!

    ReplyDelete
  14. Marilyn I loved it!
    great tutorial and I will do it!

    ReplyDelete
  15. beautifully done Marilyn... I love it!!! thanks for the tutorial.. Hugs...xoxo

    ReplyDelete
  16. Muy linda tu página, excelente tutorial, esas capas le dan mucha dimensión a la página.
    Gracias por compartir.

    ReplyDelete
  17. Wow, what stunning results!! I'm going to have to try this technique out!! ~ Blessings, Tracey

    http://gracescraps.blogspot.com/

    ReplyDelete
  18. Great tutorial! Very cool background!! Love how it turned out...

    ReplyDelete

Post a Comment

Gracias por sacar de tu tiempo y dejarme un mensaje son bien apreciados, me encantan!!!

Popular posts from this blog

The Paper Variety-Blog Hop

Hi!! Today is the first Paper Variety Blog Hop !!!! I'm so excited to announce this week's color challenge, the great prize and the beautiful projects that the design team would made for your inspiration!!! and of course, some blog candy for hopping today!!! If you came from MINDY'S BLOG you're in the correct place.  If not, head back to THE PAPER VARIETY to get started from the beginning. You don't want to miss a thing!! This week is a color challenge. Our sponsor for this week's challenge is  Your Scrapbook Stash ! In order to win this GRAND PRIZE you need to submit your own GREEN project to The Paper Variety  by Tuesday at NOON. If you submit before Sunday evening, you have a chance to have your blog featured on TPV! ;) To get you inspired, I want to share with you.... MY PAGE.... ..... I made this page about my daughter's birthday.  My husband took this photo the day we left the hospital.  My mom bought this dress for Paola, she looked

Scrapbookchallenges Blog Hop!! :)

BLOG-HOP  Scrapbookchallenges Hola!!  Si estas de visita y te nos quieres unir comienza por ir al blog de    Pamela . Si es tu primera vez aquí, mi nombre es Marilyn Rivera gane el concurso  "The Top Scrapper"  y obtuve el pase directo al "Design Team" de  scrapbookchallenges.   Vivo en Puerto Rico con mi esposo e hijos Alexander y Paola.  Trabajo en el campo de la moda y hace cuatro años comencé este pasatiempo y ahora soy totalmente adicta ....es mi terapia!!  Me encanta crear!! HI!!   if you have just stopped in, please join us and start at  Pamela 's   blog. If is your first time here, I'm Marilyn Rivera, I won  The Top Scrapper  Challenge and got the bye to  Scrapbookchallenges'  s Design Team. I live in Puerto Rico with my husband and my kids Alexander and Paola.  I work in Fashion field and started in this hobby four years ago and  now I'm totally addicted,,,it's my therapy!!  I love to create!!! Este es el sketch/ This is the sketch:

Wonderful Layout + Video Tutorial....My Creative Scrapbook

Hello sweet friends! Today I share with you one project and Video Tutorial that I made with November LE kit by My Creative Scrapbook featuring Prima Marketing: stencils, flowers and the Royal Menagerie collection, also includes Wild Flower papers, stickers by We R..It is really an awesome kit!!! I cut out butterflies from one of the We R papers and I used the new Prima oil pastel to enhance the paper colors...you will see all the process in the video tutorial. My title is a stickers by We R ... I  punched and draped the paper , take a look at the video...  List supplies: art basics: gesso, gel mediums(gloss & Matte) Soluble Oil Paste, art ingredients: glass beads, micro beads by Prima Marketting Big Pen Brush by Faber Castell-  Here is the kit and you can purchase .... HERE Take a cup of tea or coffee and enjoy the video tutorial....and if you like it don't forget to click "Like"... :) Thanks for stopping by...until next time!! Have a